Enamel Pin Care and Repair
How to Care for your Enamel pins over time and basic repair tips.
Prevent & Protect
The best way to care for your enamel pins is to protect them from damage and exposure to the elements.
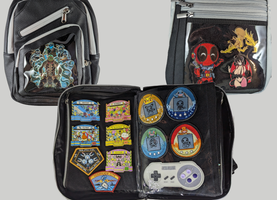
Being collectors ourselves we wanted to protector our pins and patches for as long as possible so we built a line of bags to protect your pins and patches from the elements so that you wouldn't have to repair them. We set our bags at reasonable pricing so that you can afford to fill them based on your personality.
PROTECT YOUR COLLECTION WITH LEET , CROSSBODY CRUSADER AND THE P3 BAG SETS
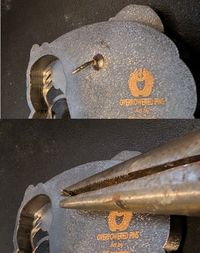
Bent Posts
Enamel Pin posts can be bent as the courier is shipping them to you. Whether they are extremely bent or slightly crooked, they can all be corrected using a pair of pliers to gently and slowly straighten them once again.
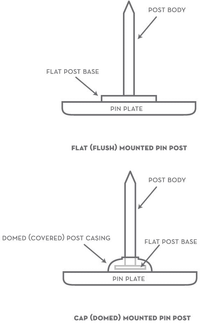
Wobbly Posts
Wobbly posts are due to the fact that there is a feature built in to the pin to keep the post from completely snapping off. Thus to re-secure it you will need to find a way to glue down the post body inside or secure it to the post casing which could look messy.
You can use one of the methods below:
1. Cyanoacrylate (Super/Crazy) Glue extremely runny original version + Baking soda. Run some glue down the post body in to the plate and a good amount around the edges then sprinkle on some baking soda and blow off. allow time to dry.
2. Weld the post back on the post casing. using Solder. Materials Needed: Iron / Welding / Arch Torch, Flux.
Broken / Snapped Posts
If a post has broken off for whatever reason It can be repaired quickly using 2 different methods. If your post has broken in half or is missing then you will need to purchase a replacement post in order to repair your pin. This repair method can be used on any style of pin for an extremely strong bond.
Use one of the methods below:
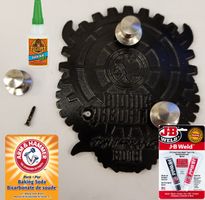
1. Cyanoacrylate (Super/Crazy) Glue Gel + Baking soda or J-B Weld.
Place a bit of baking soda on the pin then place a drop of gel based super glue on the pin or a bit of mixed J-B Weld and stick together. The bond will be instant and extremely strong.
TIP: for acrylic Pins only use an acrylic safe super glue or it will make your pin cloudy.
2. Solder/Weld the broken pin back on.
Materials needed: Soldering Iron / Welding / Arch torch, Flux.
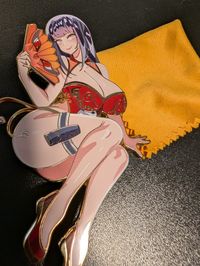
Basic Cleaning Dust & Dirt
Materials: Microfiber Cleaning cloth, Warm Water, Few drops of Dish Soap
Cleaning: Moisten the microfiber cloth in the mildly soapy water and clean dirt and dust off gently trying to ensure that any hard dirt is not rubbed to hard or it will scratch the pin. Dry thoroughly with a different microfiber cloth.
TIP: Avoid abrasive materials like paper towels that may scratch the enamel.
For pins with intricate designs, use a soft-bristled toothbrush to reach tiny crevices.
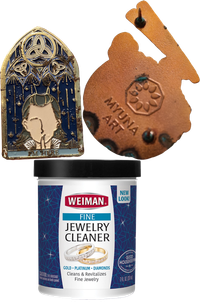
Tarnished / Corroded / Rusted Pins
Materials: Liquid Jewelry cleaner, Polishing cloth / cotton swabs, Soft bristle brush
Cleaning: Spot test the cleaner on the back of the pin first so that it won't be noticeable in case it damages the pin coating. If safe then gently rub away the tarnished / corroded / rusted areas of the pin until clean. Then buff and polish with a dry cloth.
TIP: Work in a well ventilated area and don't use any harsh chemical cleaners as they can permanently damage the pin and the enamel.
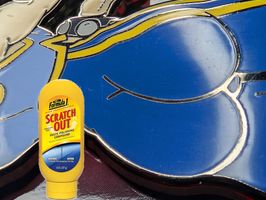
Minor Enamel Scratches
Materials: Car Polish, Microfiber Cloth
Cleaning: Apply a small amount of polish and buff the surface of the pin with a microfiber cloth using circular motions going clockwise and counter clockwise until scratches are removed.
TIP: Do not use too much pressure as this can make the scratch worse. Not for use on deep scratches.
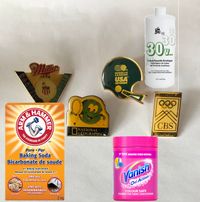
Discoloration & Yellowing
Materials: Mix 1 Water and mild dish soap, Mix 2 Hair Peroxide 30, Baking Soda, any Oxi Action stain remover, Soft toothbrush or Microfiber cloth. Plastic wrap & UV light or Sun.
Cleaning: Wash pin with water and mild dish soap. Create a paste by mixing everything in Mix 2. Then gently rub or scrub the area using a small circular motion. Wrap in plastic wrap and leave in the sun or other UV light for 8 hours.